Usage
Now that our system is setup and ready to go, we can start using it.
First, we need to run our management website and its corresponding backend.
Installing Management Webapp
Now that we have the LTSP server ready to use, we need to install the management web application. The application frontend is written in react and the backend is written using fastAPI. If you haven't already, clone the repository at GitLab.
git clone https://gitlab.com/icfoss/Internship-projects/soee-mono.git
Backend setup
Warning
It is mandatory that the backend is hosted on the proxmox server itself. This is so that the backend can access the proxmox configuration files directly and manipulate them. We will mount the /etc/pve/nodes/<NodeName>/qemu-server directory inside the container later.
You need to create a linux container inside the Proxmox server so that it can host the backend as well as access the proxmox configuration files directly. Use the proxmox WebGUI to create the container and copy contents of the vmcloud-backend folder into it.
cd soee-mono
scp -r vmcloud-manager root@<prxmox_container_ip>:  # Require SSH server inside the container
Now inside the container run the following to install python3 venv and install the dependencies:
apt install python3-venv
cd vmcloud-manager
python3 -m venv .env
source venv/bin/activate
pip install -r requirements.txt
mkdir qemu-server # To mount the qemu-server folder inside the container
qemu-server folder inside the container so that the backend can access it directly.
Note
This needs to be run in the proxmox server root shell.
pct set <container_id> -mp0 /etc/pve/nodes/<NodeName>/qemu-server,mp=/root/vmcloud-manager/qemu-server
Tip
Check if the folder is properly mounted using ls /root/vmcloud-manager/qemu-server inside the container's shell.
It should list all the VM configuration files in the qemu-server folder. Do not continue if this is not the case.
Try the troubleshooting steps in the proxmox documentation if this doesn't work.
Now run the following command to start the backend:
uvicorn main:app --host 0.0.0.0 --port 8000
This will start the backend FastAPI server on port 8000. Check if the backend is running by going to http://<proxmox_container_ip>:8000/ping
Frontend setup
Now that our backend is up, we can setup our frontend. You have the freedom to run the frontend anywhere you want. Just make sure it can access the backend.
Building the frontend
You need npm installed to build the frontend.
Note
Make sure to set the backend URL in the frontend .env file to http://<proxmox_container_ip>:8000 before building
cd soee-mono/vmcloud-frontend
npm install
npm run build
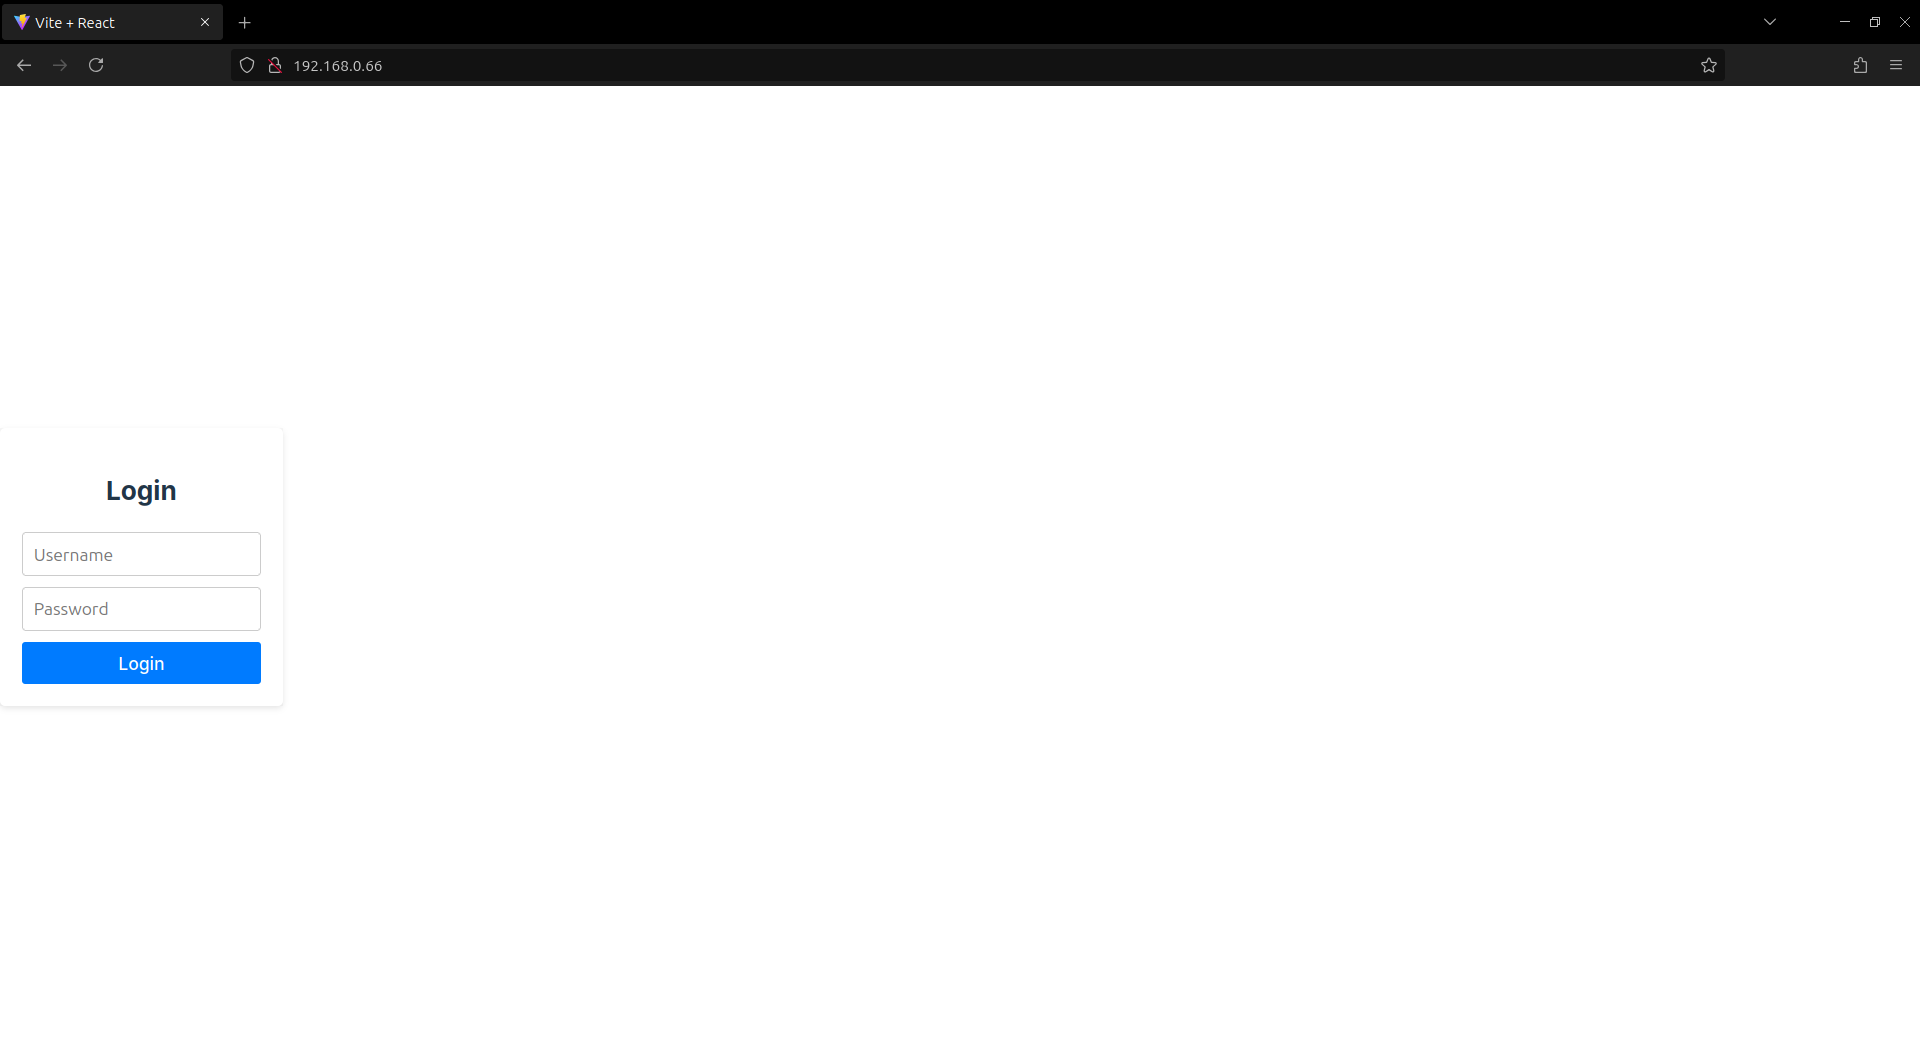
copy the dist folder and all its contents to a webserver like nginx or apache. The login screen should look like this:
Try logging in as the LDAP admin user we created earlier and you should be greeted by the following page.
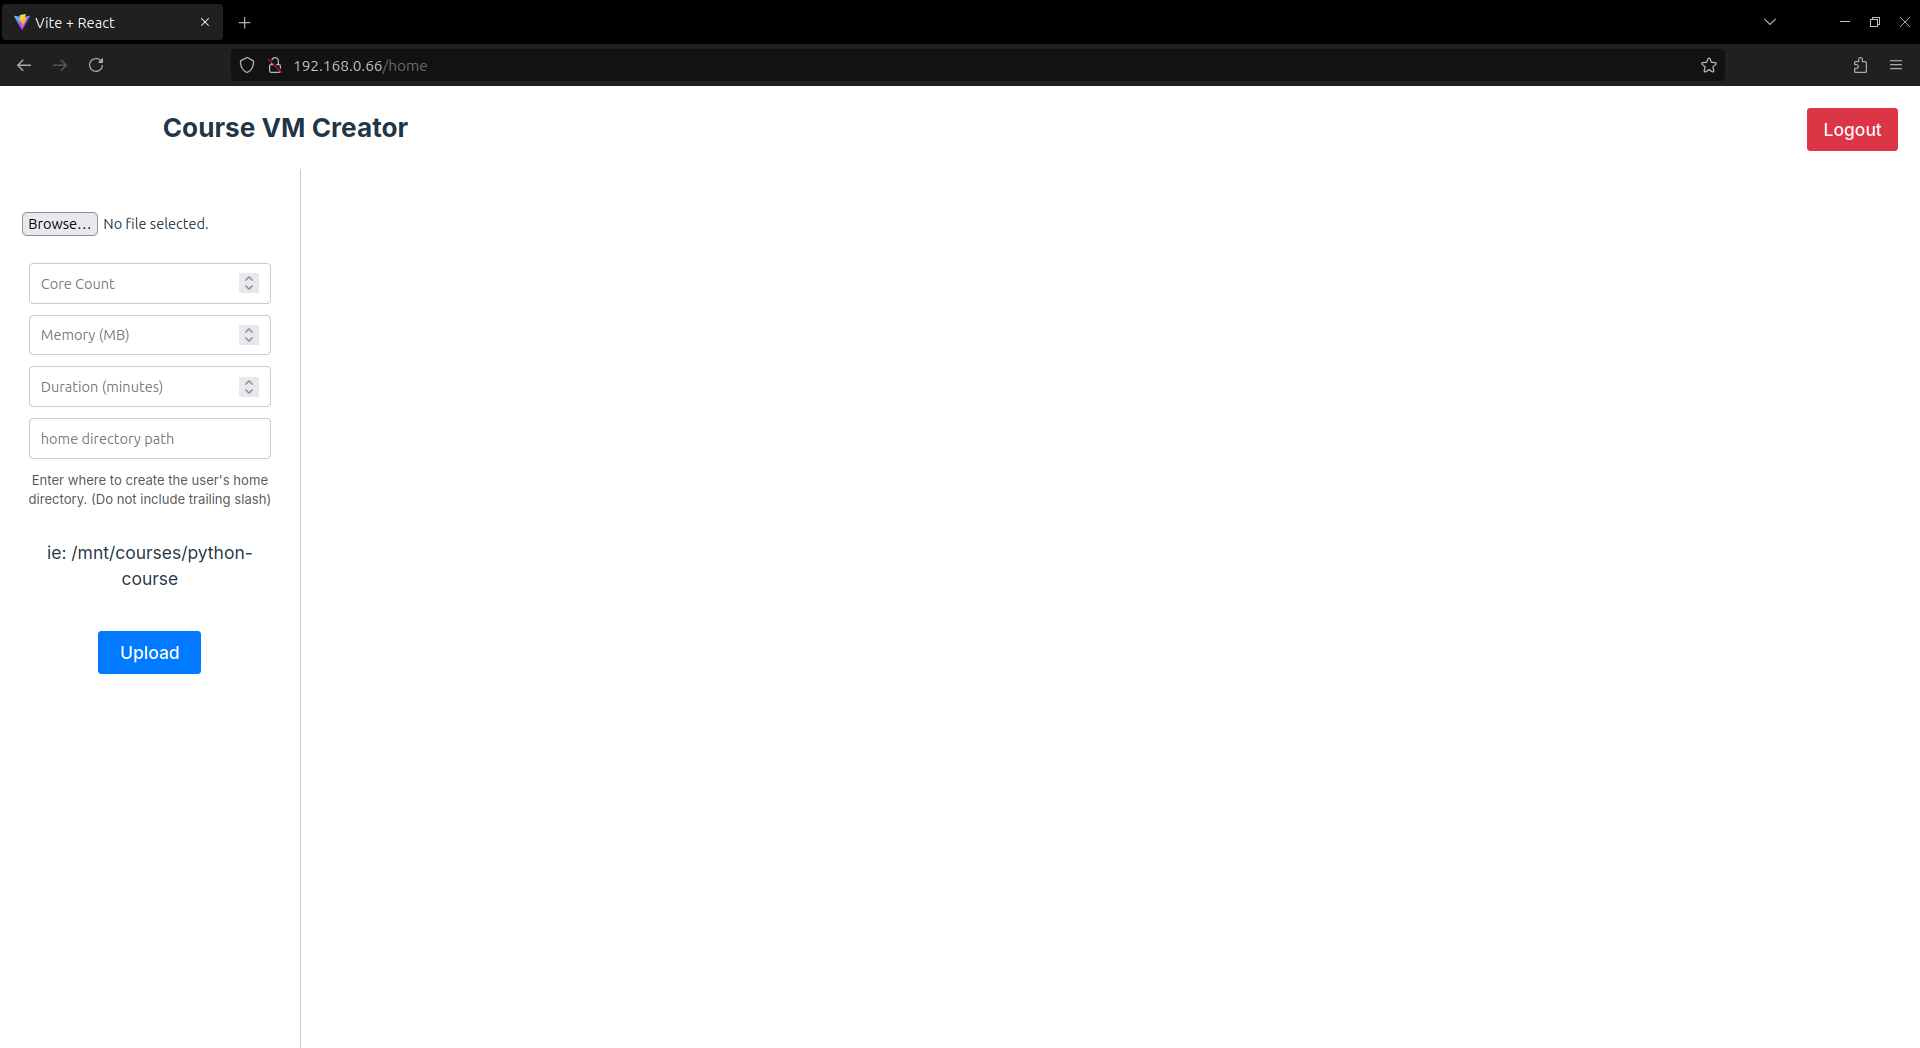
Creating virtual machines for courses.
Once we have the user list for a course, we can use this web app to automatically create all the users and virtual machines for them in our proxmox server. To do this, get the user list in a csv file in the following format
first_name, last_name
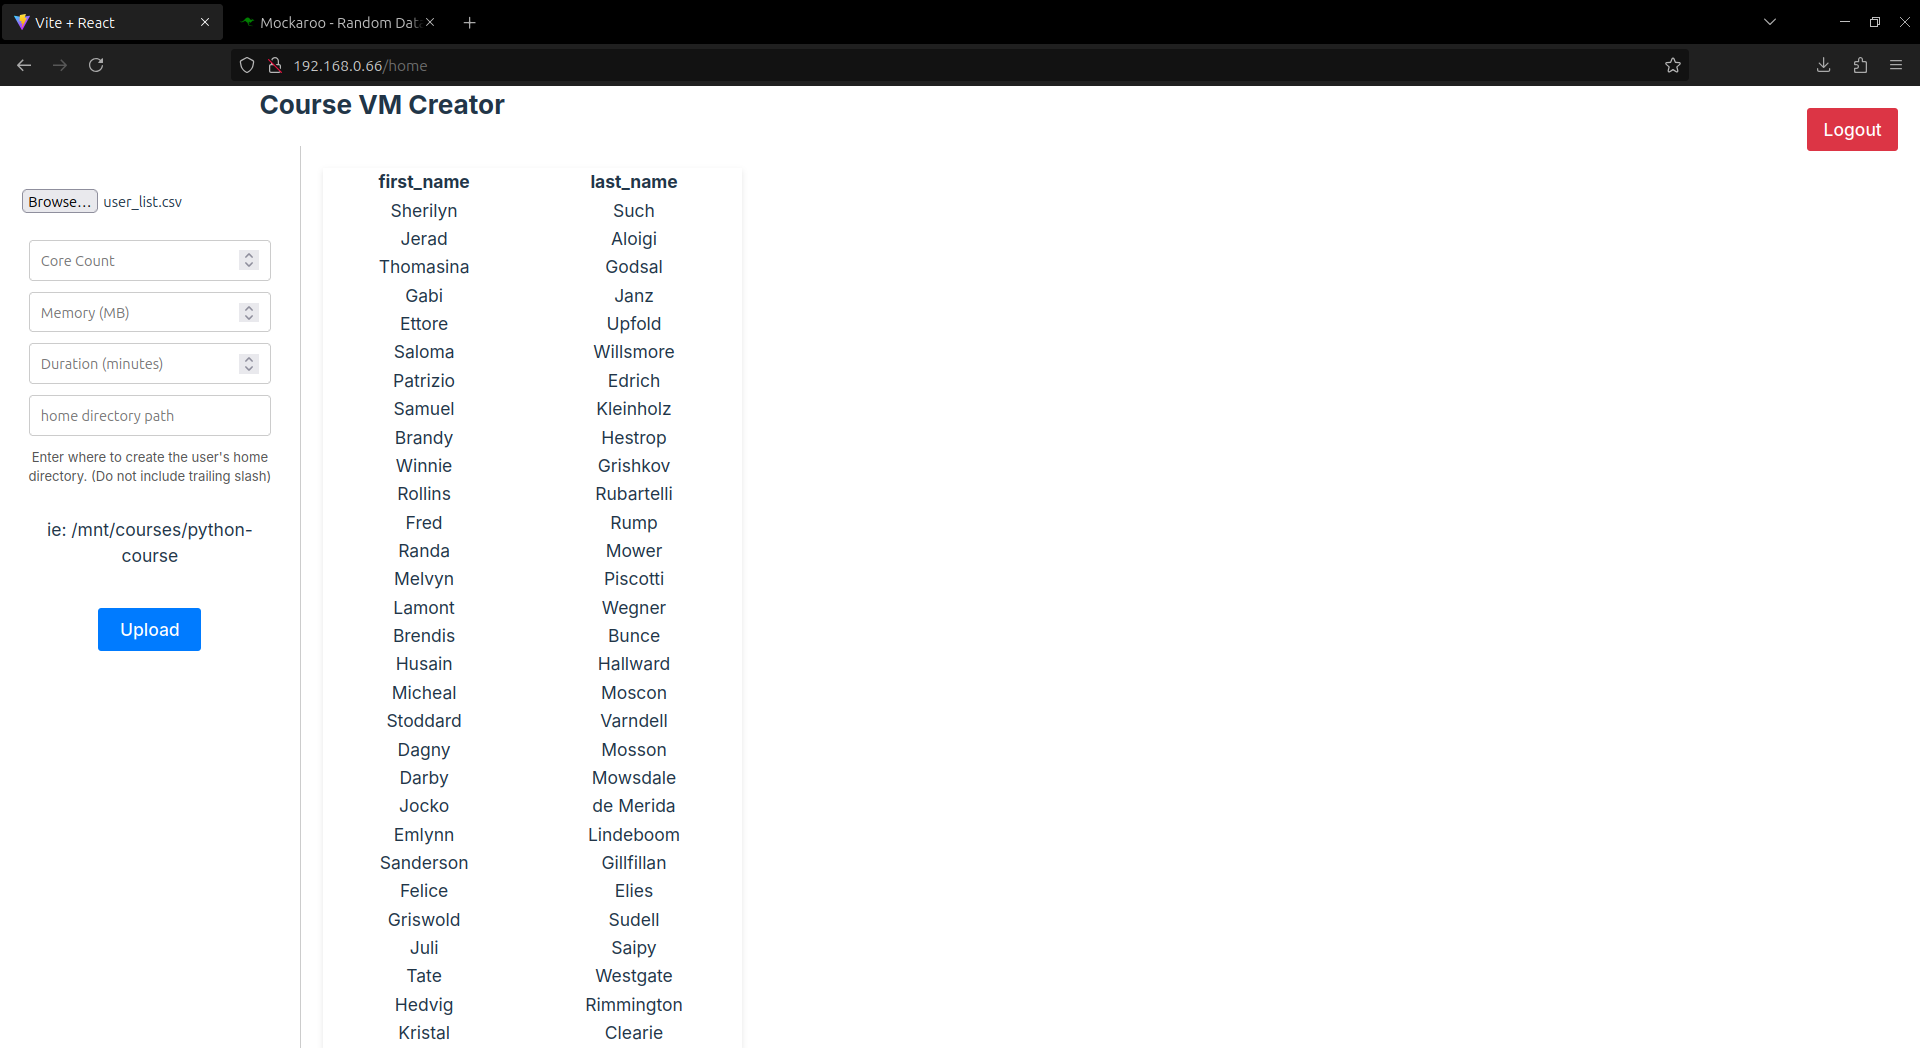
Usernames and passwords are auto generated by the backend. Once the CSV file is ready, upload it through this page. It should give you a preview of the user list if the csv is in valid format.
!
Fill up the rest of the form and click upload. You will now see a response page with the created users with their username and password. You can download the file by clicking on the download button at the bottom.
Note
The virtual machines and the users are being created in the background. It takes approximately 5 seconds per user to fully create the user and virtual machine. Do not attempt to login until the users are created. You can view the progress of the VMs being created in the proxmox web interface.
Share the login credentials from the response CSV file to the users via preferred means.
Warning
Make sure you set the duration to be long enough for the users to complete the course. The Virtual machines will be auto deleted after this time expires.